Inside the Studio: From a Video Description to Your Voice (Part 2 of 3)
In Part 1 we got the studio running: ten seconds of your voice, a description of the video, and a voiceover that sounds like you. If you stopped there, that’s fine. It works.
But a working example only takes you so far. The interesting part, at least for me, is the dozen small decisions between the button and the audio file. Why the text is spoken one sentence at a time. Why the watermark goes on last. Why two models can share one GPU without stepping on each other. And why my first UI, which worked perfectly, was still wrong.
This part walks through all of it. I’ll keep the post to the ideas and the trade-offs; the repo has a guided tour of the actual code for every step, and I’ll point you to it as we go.
By the end of this part you’ll know how a voiceover moves through the studio, from the consent check to the finished files, why each step is there, and how to add a feature of your own as a plugin without touching the core. Part 3 covers the AWS side and the bill.
A core that doesn’t care which model you use#
Here’s a fact that shaped the whole design. When I started researching voice models for this project, one of the best open ones, Chatterbox, had just been retired by its makers: no longer maintained since August 2026. A few months earlier it would have been the obvious choice. That’s how fast this space moves.
So my bet is simple: whatever model I pick today won’t be the one you’d pick a year from now. The design should make swapping it boring.
flowchart TB
  ui["UI and HTTP API"] --> services["Services<br/>the use cases"]
  services --> core
  subgraph core["Core: never changes when a model changes"]
    direction LR
    consent["consent"] --- script["script"] --- render["render"]
  end
  core --> ports["Provider interfaces<br/>tts · llm · asr · storage"]
  plugins["Plugins<br/>fit to length · translate"] --> ports
  ports --> qwen["Qwen3-TTS"]
  ports --> vllm["vLLM<br/>(on your server)"]
  ports --> whisper["Whisper"]
  ports --> s3["S3"]
The app is split into three layers:
- The core owns the workflow and the guardrails: the consent check, the script rules, how text is split, how audio is joined, levelled and watermarked. It only ever talks to interfaces, never to a specific model.
- Providers do a fixed job in a swappable way. There are four kinds: text-to-speech, the language model, speech-to-text (for the consent check) and storage. You pick them in a settings file.
- Plugins add new features at a defined point in the flow. More on those at the end.
The part I’d point to if you only read one thing: every provider declares what it can do. Which languages, whether it can clone, how long the reference sample should be, how much text it takes in one call, whether it runs in your account or sends your data elsewhere. The core and the UI read those declarations instead of assuming. The language list you see in the UI isn’t hard-coded anywhere; it’s whatever the current voice model says it supports.
The language model adapter speaks the common OpenAI-style API, so it could also talk to a hosted service such as Amazon Bedrock. That’s opt-in and not switched on in this version (it needs extra permissions). If you turn it on, your script text, never your voice, leaves your server for that service. The default keeps everything on it.
And because the guardrails sit in the core, swapping a provider can’t skip them. A new voice model still goes through the consent check, and its output still gets watermarked.
Read the code: How a voiceover is made follows one voice, one script and one render through the app, file by file.
Ten seconds, three jobs#
You read one sentence. That recording has to be good enough to clone, has to prove consent, and becomes the transcript the voice model uses. So it goes through two checks before anything is saved.
Is it a usable recording? The app trims the silence and measures it:
| Check | Blocks saving when |
|---|---|
| Length | shorter than 5 or longer than 15 seconds |
| Distortion | more than 0.1 % of the samples hit the maximum level |
| Volume | the overall level is below −35 dBFS (too quiet; dBFS measures level against the loudest a digital file can go) |
| Background noise | the quietest moments are within 15 dB of the speech (a warning, not a block) |
Did you actually say the sentence? Whisper turns the recording into text, and the app compares it word by word with the sentence. Below 80 % match, nothing is saved. It’s not a perfect consent mechanism (nothing in software is), but it means the tool can’t be fed a clip of somebody else talking about something else. What it can’t tell is whether the voice reading the sentence is a real person. Someone determined could clone another person with a different tool first, and feed that in. The check stops casual misuse, not a determined one, which is why every output is watermarked as well.
One decision here is worth calling out. Whisper runs on the CPU, not the GPU. It only ever transcribes a ten-second clip, which takes a few seconds on a CPU, and it frees GPU memory for the two models that actually need it. Not everything in an AI app has to run on the GPU just because there is one.
Writing for the ear, not the eye#
A script for a voiceover isn’t a blog post. Nobody can re-read a sentence they didn’t catch, and a voice model will happily read out “Section 2.1” or an asterisk if you give it one. So the instructions to the language model are mostly about the ear:
- Write only the words to be spoken: no titles, bullet points, markdown, emoji or stage directions.
- Short, clear sentences. Numbers, symbols and abbreviations written the way they’re said.
- Never put words in a real person’s mouth, and no deceptive content. If asked, reply with one line:
REFUSED:and a reason.
Hitting a length is plain arithmetic. People speak at about 150 words a minute, so a 30-second voiceover is about 75 words:
def target_words(seconds: float, words_per_minute: int) -> int:
    return max(1, round(seconds * words_per_minute / 60.0))
Two things I learned the practical way:
- Reasoning models think out loud unless you tell them not to. Qwen3.5 writes a long hidden “thinking” section before answering by default. For a 75-word script that’s slower, costs more and adds nothing, so the studio switches it off on every request.
- Models add decoration anyway. Even with clear instructions, you’ll sometimes get a “Narrator:” label, a
heading, or
[upbeat music]. Rather than hope, the app cleans the reply before you see it: it strips reasoning tags, markdown, speaker labels and bracketed directions. Instructions reduce the problem; code removes it.
One sentence at a time#
The voice model never sees your whole script. The app splits it into sentences and speaks them one by one. That sounds like a limitation, but it’s the reason several things work:
- Natural pauses. A short, consistent pause between sentences (250 ms) sounds like someone reading, not like a model racing to the end.
- Captions for free. Each sentence’s start and end time is known, so each one becomes a caption.
- Progress you can see. The UI shows “sentence 4 of 11” instead of a spinner.
- Limits. Voice models have a maximum amount of text per call. A sentence that’s still too long is split at commas, then at spaces.
Splitting sentences is harder than it looks. “Dr. Rao measured 3.5 litres.” is one sentence, not three. The app knows the common abbreviations and doesn’t break on decimals.
And then there’s the bug I’d never have found without building the translation plugin. Chinese and Japanese don’t put a space after a full stop, and they use different full stops (。!?). The splitter waited for a space that never came, so a Chinese script was cut in the middle of a sentence wherever the length limit happened to fall. Word counts were wrong too, because there are no spaces between words either. The fix was small (full-width punctuation ends a sentence, and about two characters count as one spoken word), but it’s a good reminder: every new language is a new test case, not a new setting.
Join, level, mark: the order matters#
Once every sentence is spoken, the clips become one voiceover:
flowchart LR
  speak["Each sentence<br/>spoken"] --> join["Join<br/>+ 250 ms pauses"]
  join --> level["Level loudness<br/>to −16 LUFS"]
  level --> mark["Watermark<br/>(inaudible)"]
  mark --> files["voiceover.wav<br/>captions · provenance"]
- Join. The clips are joined with the pauses in between, and the app records exactly where each one starts and ends.
- Level. Different sentences come out at slightly different volumes. The app measures the overall loudness and scales it to −16 LUFS, then makes sure no peak goes above −1 dBFS. LUFS measures loudness the way ears hear it, not just the raw signal level. −16 is a common target for spoken word. YouTube plays loud uploads back at about −14 and turns them down, never up, so −16 leaves a little room for mixing the voice under music.
- Mark. Only then is the inaudible watermark added. That’s the point of the order: if levelling came after marking, it would change the audio the mark was written into. The watermark is the last thing that touches the sound.
- Files. The WAV file carries an “AI-generated voice” label inside it. The captions are written as SRT, at most
two lines of 42 characters per caption, which is what video players expect. And
provenance.jsonrecords the label, the watermark, the voice’s consent record and the settings, so you can show later how a file was made.
Here’s what that looks like for the 15-second sample in Part 1. The first captions:
1
00:00:00,000 --> 00:00:02,400
This voice belongs to nobody.

2
00:00:02,650 --> 00:00:07,314
A model designed it from a one-line
description, and the studio cloned it from
And its provenance file, trimmed:
{
  "label": "AI-generated voice (voiceover-studio)",
  "tts_provider": "qwen3_tts",
  "tts_runs_locally": true,
  "watermark": { "method": "audioseal", "message": "0x5653" },
  "loudness_lufs": -16.0,
  "seconds": 15.14
}
Does the mark survive a real edit? That’s the question that matters, because nobody uploads the raw file. You mix it under music and export a video. So I did exactly that with the sample: music 18 dB quieter than the voice, exported as an MP4 with AAC audio at 128 kbps. The detector still found the studio’s mark in 89 % of the audio. The same voice without a mark, through the same steps: 0 %.
Testing it also caught a real bug. The first run said 2 %, on the untouched file. AudioSeal works at 16 kHz and, since version 0.2, no longer converts other rates for you; the voice model’s audio is 24 kHz. So the mark was written as if the audio were 16 kHz. It read back perfectly as long as nobody touched the file, and vanished the moment anything resampled it, which every video export does. The fix was a few lines: mark a 16 kHz copy, and resample only the mark back. Every check I had passed, because every check read the file straight back.
Anyone can check a file, audio or video, with one command:
uv run python scripts/check_watermark.py my-video.mp4
# my-video.mp4: watermarked by the studio (89% of the audio carries the mark)
Two models, one GPU#
The server has one NVIDIA L4 with 24 GB of memory. Two models need to live on it: the script writer and the voice.
My research said the 4-bit script writer would need 6 to 7 GB. In practice the build I picked is about 9 GB, because parts of the model stay at full precision. That’s the kind of number you only find out by downloading the thing. The split that works:
| GPU memory | |
|---|---|
| Script writer (vLLM serving Qwen3.5-9B, 4-bit) | about 11.5 GB: half the GPU, reserved up front. Most of it is the model; the rest is working memory for its context |
| The studio app (voice model and watermark) | about 4.3 GB: the rest of the measured total |
| Speech-to-text (Whisper) | none: it runs on the CPU |
| Measured with both loaded | 15.8 of 23 GB, about 7 GB to spare |
vLLM is an open-source server that runs language models efficiently on a GPU. One thing about it is easy to miss: it doesn’t take what the model needs, it takes what you give it. One flag reserves half the GPU when it starts, and it fills whatever the model leaves over with working memory. So its share is set by that flag, not by the model’s size.
Two small flags matter more than they look. Qwen3.5 can read images too; the studio only needs text, so the image part isn’t loaded at all. And the context is capped at 8,000 tokens, because scripts are short, which keeps the model’s working memory small.
There’s also a job queue with exactly one worker. One GPU means one render at a time; a second request waits instead of fighting the first for memory. It’s the simplest possible scheduler, and for a single-user tool it’s the right one.
That’s how the 66-second voiceover from Part 1 came back in under a minute, faster than real time.
The UI I got wrong the first time#
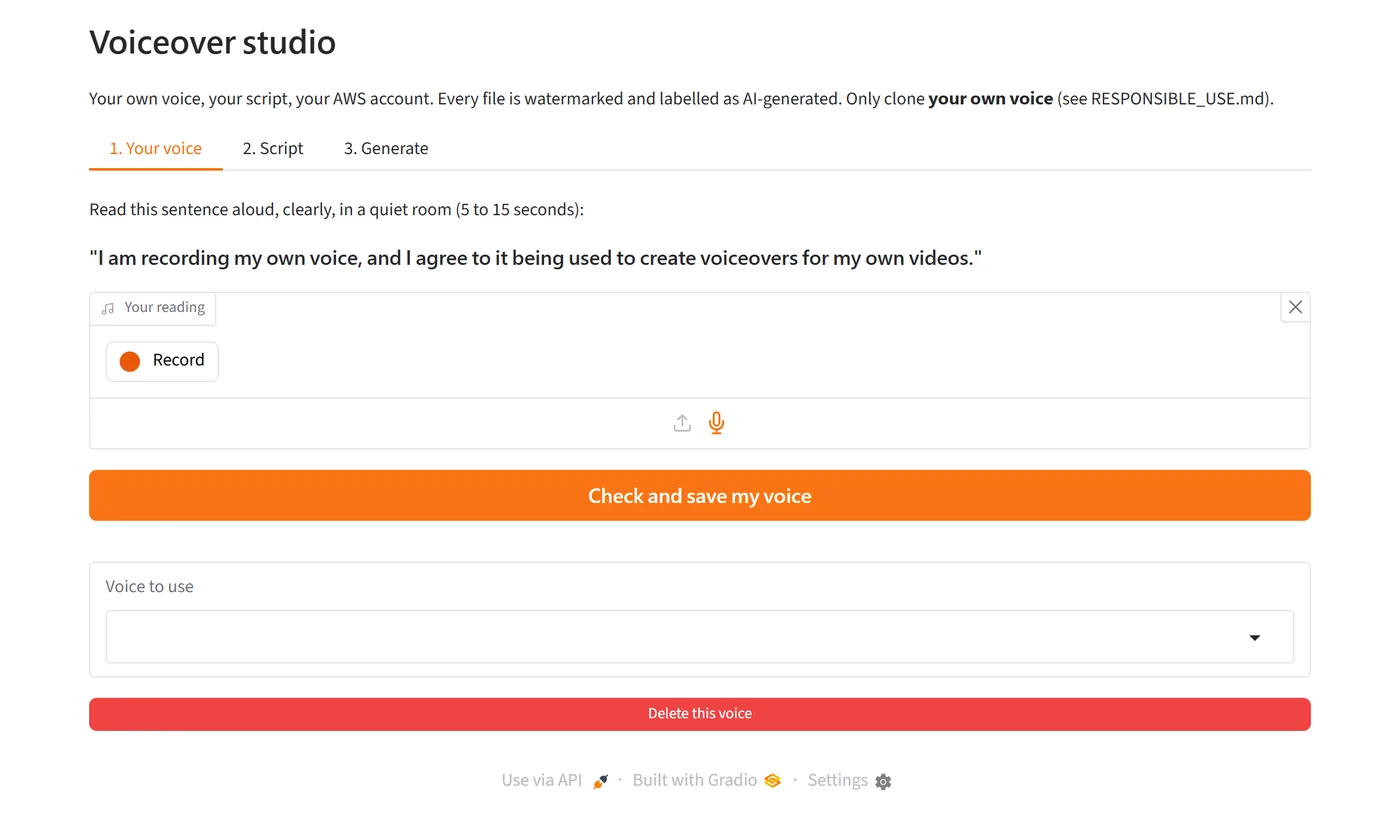
The first UI, built with Gradio, had three tabs: Voice, Script, Generate. Everything worked. But when I actually used it, I didn’t know what to do after saving my voice, fields like “Audience” and “Tone” had no explanation, and the Generate tab didn’t say which voice or script it was about to use.
None of that is a bug. All of it is a reason someone closes the page.
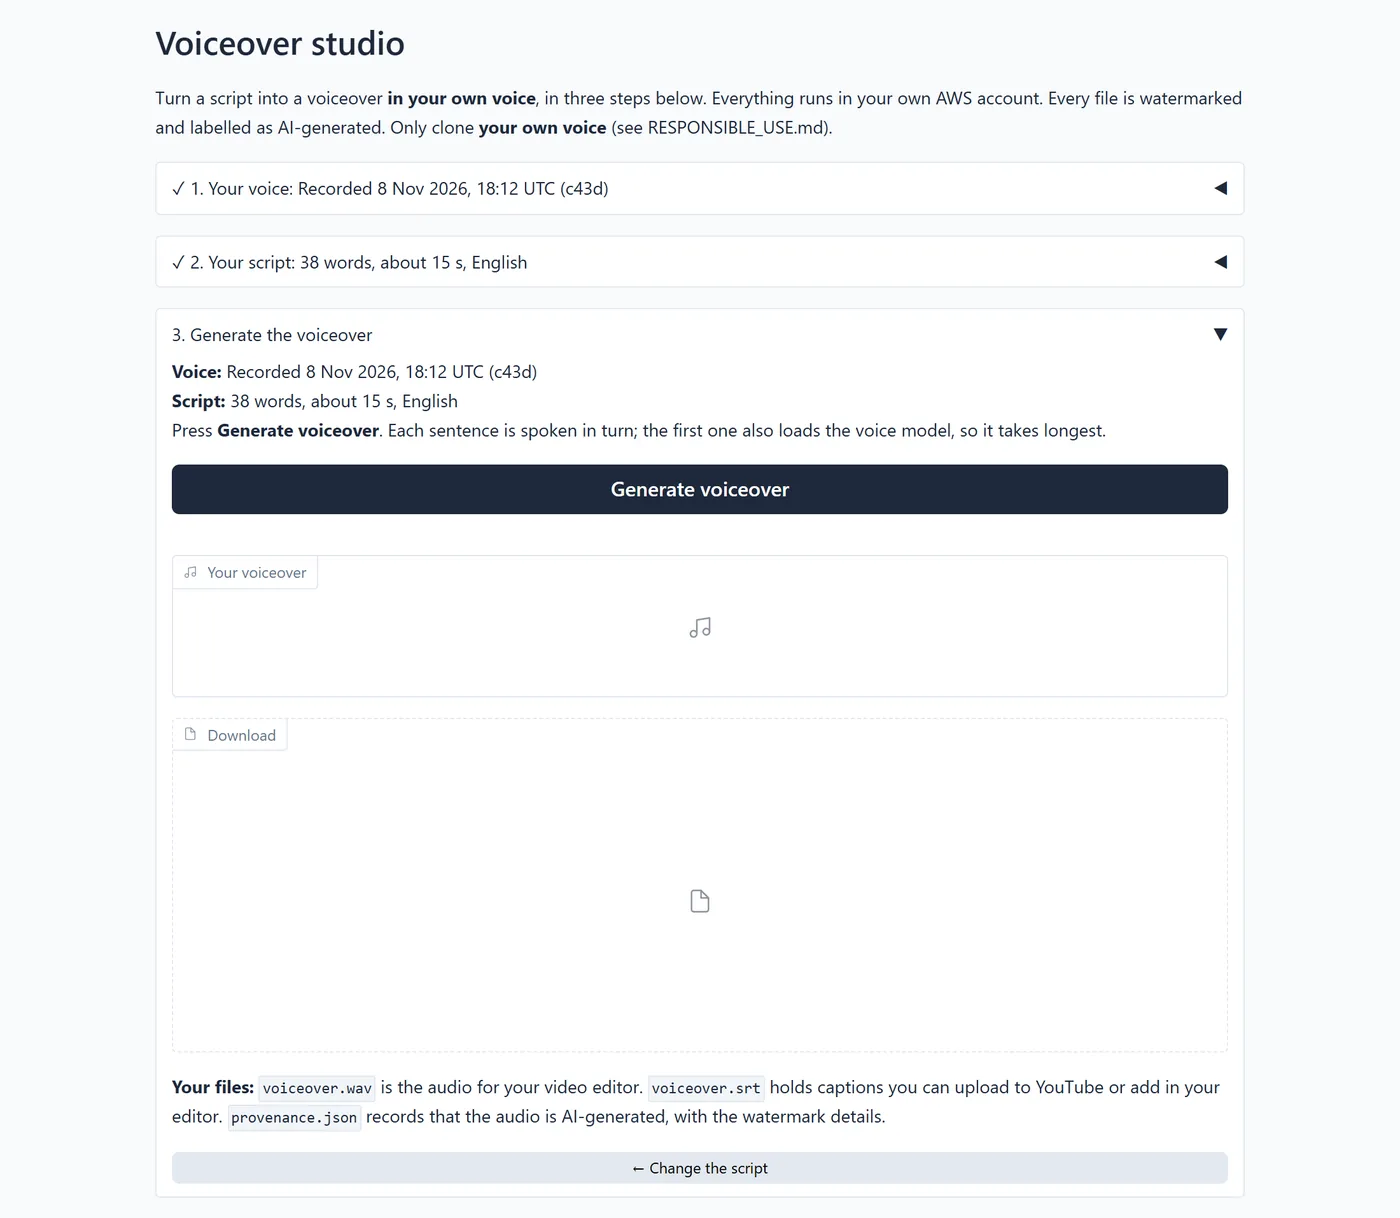
The fix was one page with three numbered steps. A finished step collapses to a one-line summary and opens the next, and step 3 shows exactly which voice and script it will use before you press anything.
Brave froze for me. Firefox, Chrome and Edge recorded fine in my testing, but in Brave the recorder froze. The likely cause is a known Gradio issue: Brave’s fingerprinting protection trips up how this Gradio version reads the recorded audio. A newer Gradio fixes it, but the voice model’s library pins an older dependency that holds Gradio back. You inherit your models’ dependency choices too.
Read the code: The UI covers Gradio’s basics, the three steps, how the handlers are tested without a browser, and why the microphone only works on localhost.
Plugins: features without touching the core#
The last piece is how the studio grows. A plugin is a small class with four things: a name, the point in the flow
where it runs (after the script, after the audio, or after the files), its settings, and a run function. The
settings are a typed model, and that’s what makes plugins cheap:
class Settings(BaseModel):
    tolerance_percent: int = Field(10, ge=5, le=30, description="How close to the target is close enough")
    max_attempts: int = Field(3, ge=1, le=4, description="Rewrites to try before keeping the closest one")
The UI turns that into controls on its own: a number with a minimum and maximum becomes a slider, a fixed list becomes a dropdown, true/false becomes a checkbox. A new plugin needs no UI code at all.
Two plugins ship with the studio:
- Fit to length rewrites your script to match the length of your video. It asks the language model for a rewrite of about the right number of words, counts the result, and tries again (up to three times) until it’s within 10 % of the target. If it never gets there, it keeps the closest version and tells you so, rather than pretending.
- Translate turns the script into another language the voice model can speak. Its list of target languages comes from the voice model’s declaration, so a model with more languages means more choices, with no code change. It also checks the answer: if the model returns the text unchanged, or a “Chinese” translation with no Chinese characters in it, that’s an error with a clear message, not a silent success.
Fit to length solves the more common problem in practice: a voiceover that’s 12 seconds too long for the video. Translate is the one to read first if you want to write your own: it shows a plugin that reads the provider’s capabilities, calls the language model and checks what comes back.
Write your own: the repo’s plugin guide walks through the contract with Translate as the worked example. The tests run in about 15 seconds without a GPU, so it’s cheap to experiment.
What building it taught me#
Gotchas from the pipeline and the UI
- Turn off “thinking” for small tasks. Reasoning models reason by default. For a 75-word script it’s only cost.
- Clean model output in code. Instructions reduce markdown, labels and stage directions; they don’t remove them.
- Every language is a test case. Chinese and Japanese broke sentence splitting and word counts.
- Measure memory, don’t trust the estimate. My research said 6–7 GB; the model was 9 GB on disk and on the GPU.
- Watermark last. Anything that changes the audio after marking weakens the mark.
- Test a guardrail the way it will be used. The watermark passed every check that read the file straight back, and failed the first one that exported a video.
Where this leaves us#
If there’s one idea I’d take from this part, it’s that the model is the least permanent thing in the system. The consent check, the rules for a script, the order of join, level and mark, the UI’s three steps: those I expect to keep. The voice model and the script writer, I fully expect to replace. Building the rest so that swap is boring was most of the work, and I think it was the right place to spend it.
In Part 3 we go down a level, to the AWS side: what the deploy scripts actually create, the four layers between you and a surprise bill, what it really costs, how the security scanners did, and everything the first test run broke.
As always, this is my view and my setup. If you’d have structured it differently, I’d be glad to hear about it in the comments.
The models will change. The way you ask for consent shouldn’t.
The code is MIT-licensed at github.com/WornKeys/voiceover-studio.
Discussion
Comments are powered by GitHub Discussions. Sign in with GitHub to join in.